

Learn How to Leverage HubSpot's SEO Tool and Google PageSpeed Insights
This is a brief tutorial on how to create custom call-to-action buttons in Microsoft Powerpoint.
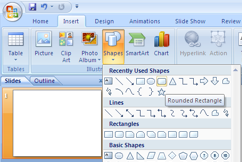
Under the Insert option on the top menu click the Shapes dropdown. There are a ton of different shapes. For this tutorial, we are choosing Rounded Rectangle which shows in the Recently Used as well as Rectangles.
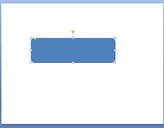
Click and drag to the desired height/width. This can be altered at any time by clicking on any of the dots on the perimeter of the rectangle and dragging in or out. The dots on the corners will keep the shape proportional. The dots on the top or sides will stretch the shape.
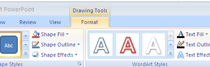
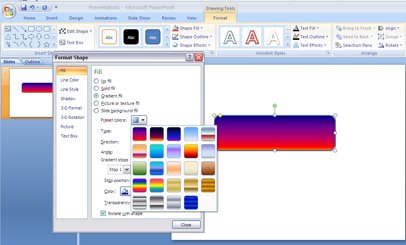
Click ‘Format’ from the top menu to make style changes
To change the fill color, choose ‘Shape Fill’ and pick a color. If you want to add or edit a gradient, box shadow, etc., choose ‘Shape Fill’ – ‘Gradient’ – ‘More Gradients’. (There is another way to do this which I will show further down.)
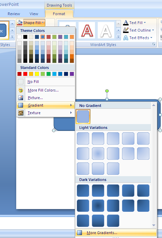
To create a Custom Gradient click on ‘Gradient Fill’ in the Fill menu, skip the Preset color and play around with the options from Angle and below until you get your desired gradient.

For a Preset Gradient, just choose one of the presets provided.
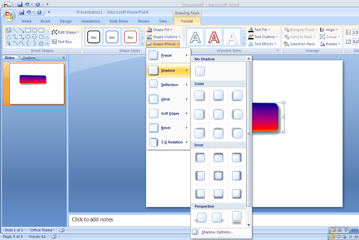
Use the ‘Shape Effects’ to put a gradient, shadow, glow, etc on your CTA (this is the “other way” referred to above). At the bottom of each Effect option window, you can choose ‘xyz Options’ to customize the effect.
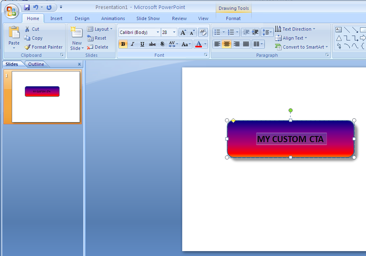
To include text in your CTA, make sure the image is selected and click ‘Text Fill’ in the ‘Format’ menu and choose the text color.

After you enter your text select it and edit it by right-clicking or going to the ‘Font’ section under the ‘Home’ menu.
Once you're satisfied with how your CTA looks it’s time to save it for the web. To do so, select the image and right-click, and choose ‘Save as picture’.

Save it as .png (that’s the cursor after the .png not an “l”) file and it’s ready to be uploaded to File Manager. Way to go, pro!


HubSpot CMS guru - takes what other people consider complicated and simplifies it.

